Step 4: Programming and Component Testing
Programming with the Arduino IDE
With the Arduino IDE a sketch can be compiled and uploaded to the senseBox MCU. Now connect the senseBox via USB cable to your computer and follow the next steps.
Configuration in the Arduino IDE
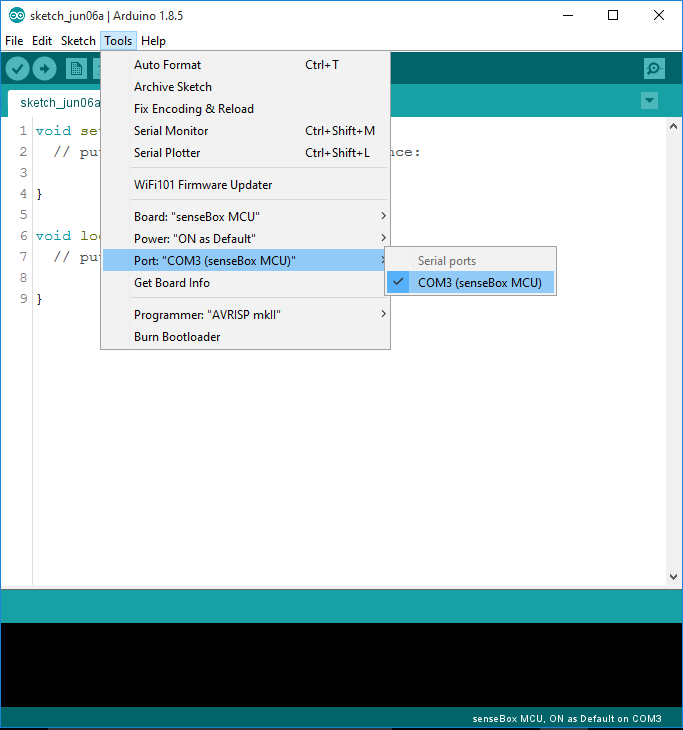
Before you can upload anything onto the senseBox, you have to adjust a few settings in the ArduinIDE. In the Tools tab you have to select the senseBoxMCU at the bottom of the list under theBoardsoption.

Tools -> Port select the port number of the USB port where the senseBox MCU is connected to the computer.
Hello World Example
Copy the example below into your Arduino environment and click on the arrow symbol in the toolbar. In the lower part of the Arduino interface you get feedback on the upload process. If everything worked, the message Upload completed should appear there.
int ledPin = LED_BUILTIN;

void setup()
{
  pinMode(ledPin, OUTPUT);
}

void loop()
{
  digitalWrite(ledPin, HIGH); // turn the LED on (HIGH is the voltage level)
  delay(1000);                // wait for a second
  digitalWrite(ledPin, LOW);  // turn the LED off by making the voltage LOW
  delay(1000);                // wait for a second
}
The text behind the // is a comment that is not evaluated by the compiler. This makes sense so that you can handle the code better and it makes it easier for other programmers to understand their and your own code.
Testing Sensors and Internet Connection
Open the Test Sketch
Open the file mcu_component_test (File -> Examples -> senseBoxMCU) from the examples. After uploading this sketch to the MCU, start the serial monitor by clicking on the magnifying glass icon in the upper right corner of the toolbar.
Options Menu
After you have opened the serial monitor, a menu appears on its functions you can access via the input field:
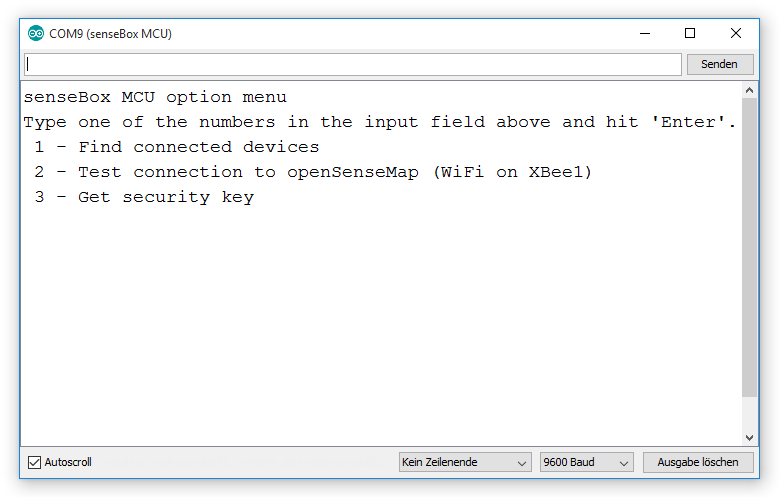
To do this, write the number of the corresponding option in the input field and click on "Send". Below is a list of options with brief descriptions.
Find connected sensors
Here you can check if all connected sensors have been properly initialized and recognized. For each connected sensor there should be a feedback and a test measurement. In the example below, an HDC1080 temperature and humidity sensor were connected to an
I2C/Wireport.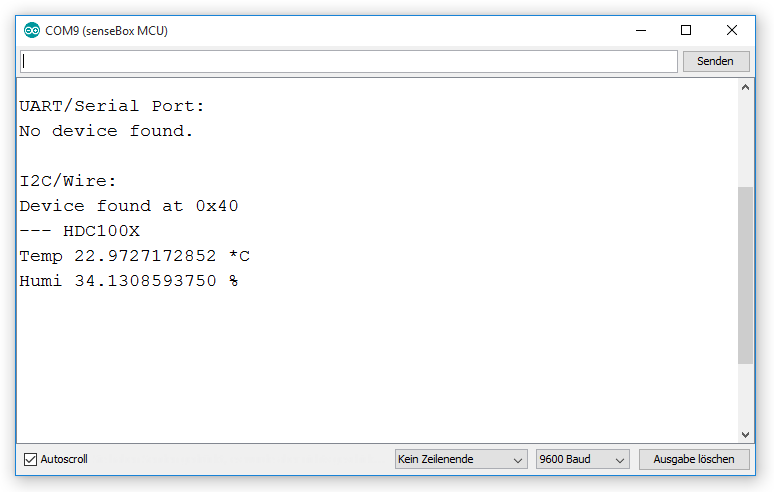 If one of the connected sensors is missing during the output, you should check the cable connection and repeat the test.
Test connection to openSenseMap
This option tests the Internet connection. If the connection is successful, a response with HTTP status 200 should be issued by the server:
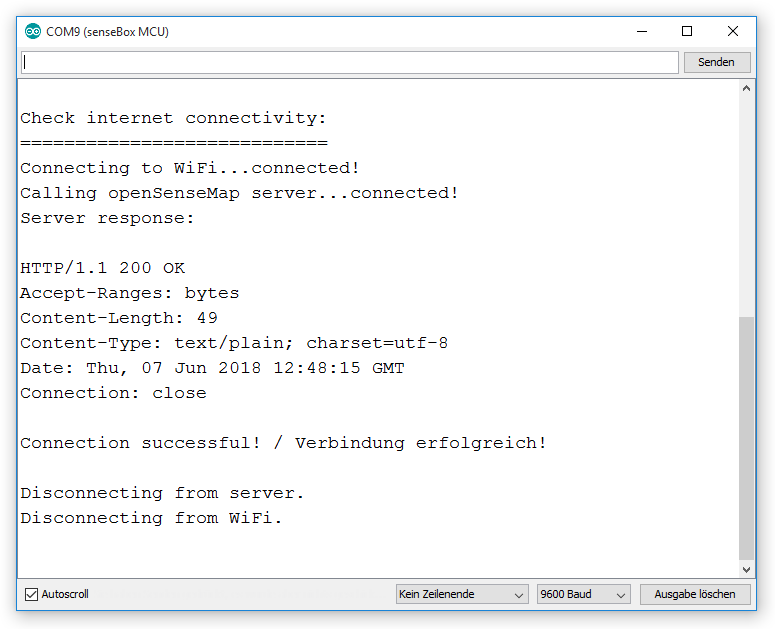 If you use a WiFi module, it also checks if the latest version of the firmware is installed on the module. If the version is outdated, you should update it:
Get security key
Each senseBox board has its own unique security key that you can read with this option. It is used to encrypt the connection between the openSenseMap and your senseBox so nobody can manipulate your measurements from the outside.
You need this key in the next step when registering your senseBox on openSenseMap.