Traffic Light
It should be simulated a traffic light. With a button you can switch the traffic light.
Materials
- senseBox MCU
- red LED
- yellow LED
- green LED
- 3x 470Ω resistance
- Button
- 10kΩ (10000Ω) resistance
- 2x senseBox JST adapter cable
Construction
Hardware Configuration
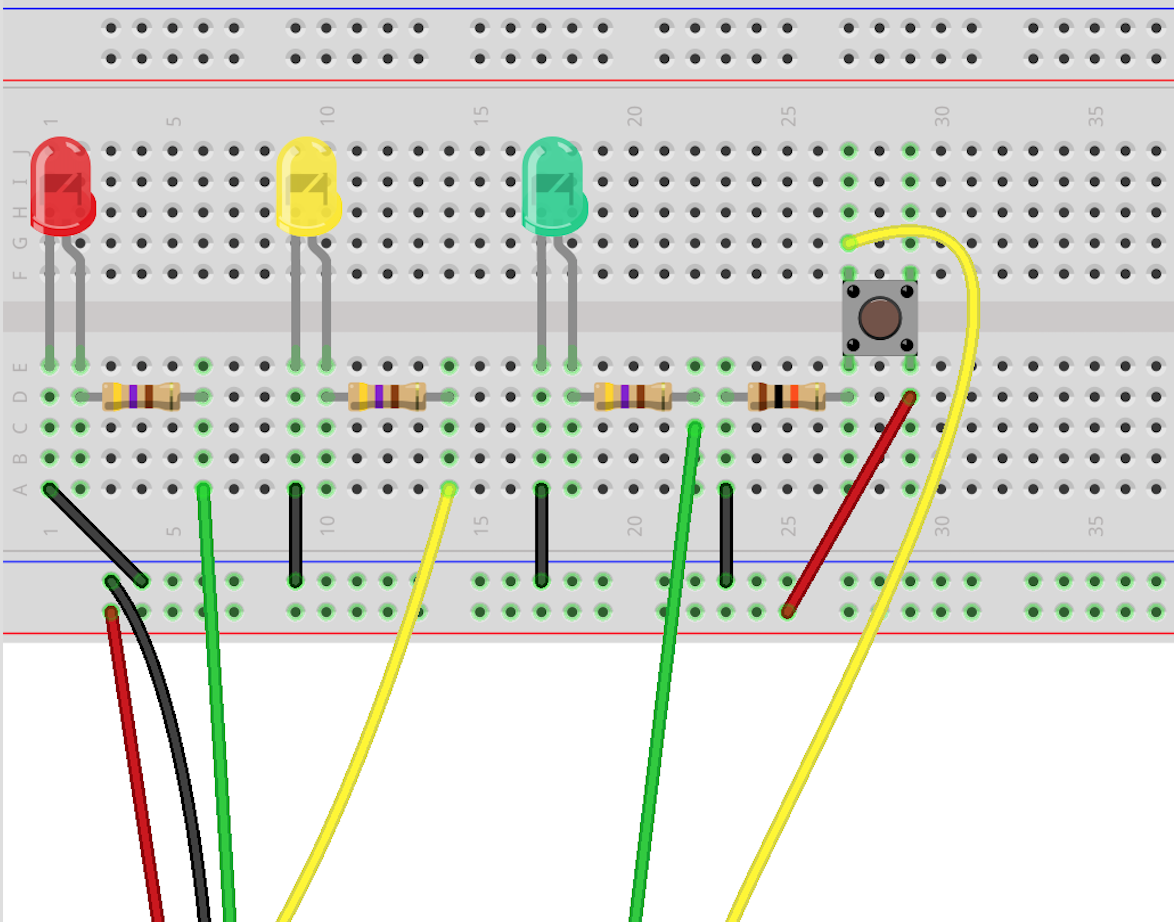
To connect all components you need two JST adapter cables. The first is connected to Digital A (digital pins 1 and 2), the second to Digital B (digital pins 3 and 4). On the cable in Digital A the red and the yellow LED are connected, on the cable in Digital B the green LED and the button.

Sketch
Arduino Source Code
int rot = 1;
int gelb = 2;
int gruen = 3;

int button = 4;

void setup() {
 pinMode(rot, OUTPUT);
 pinMode(gelb, OUTPUT);
 pinMode(gruen, OUTPUT);

 // The button should measure inputs
 pinMode(button, INPUT);

 // First set the traffic light to RED
 digitalWrite(rot, HIGH);
 digitalWrite(gelb, LOW);
 digitalWrite(gruen, LOW);
}

void loop() {

 // Here it is checked if the button is pressed
 if(digitalRead(button) == HIGH) {

   delay(5000);

   // ROT zu GRUEN
   digitalWrite(rot, HIGH);
   digitalWrite(gelb, HIGH);
   digitalWrite(gruen, LOW);

   delay(1000);

   digitalWrite(rot, LOW);
   digitalWrite(gelb, LOW);
   digitalWrite(gruen, HIGH);

   delay(5000);


   // green to red
   digitalWrite(rot, LOW);
   digitalWrite(gelb, HIGH);
   digitalWrite(gruen, LOW);

   delay(1000);


   digitalWrite(rot, HIGH);
   digitalWrite(gelb, LOW);
   digitalWrite(gruen, LOW);
 }
}
- At the beginning of the
loop()-function it is queried each time whether the button is pressed. digitalRead(button)reads the current state of the button. If pressed, the function returnsHIGH, otherwiseLOW.- To check if the button was pressed
digitalRead(button)has to be compared withHIGH. The comparison is done with two equals==(comparison operator). One equals=is an assignment, such asint red = 13.
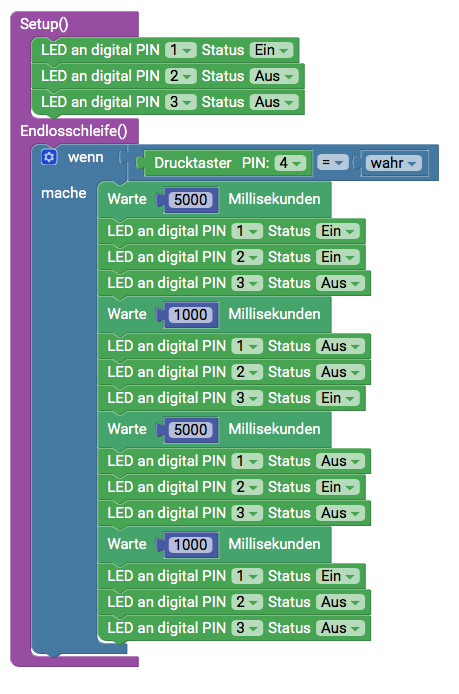
Blockly
