Step 4: Programming the Hardware
Programming with Arduino IDE
Using the Arduino IDE you can write code, compile the code and upload it on the senseBox microcontroller unit (MCU). Therefore you first have to connect the senseBox with the computer using hte USB-cable. Then follow the following steps.
Configuration of the Arduino IDE
Before you can start programming the senseBox, you have to change some settings in the Arduino IDE.
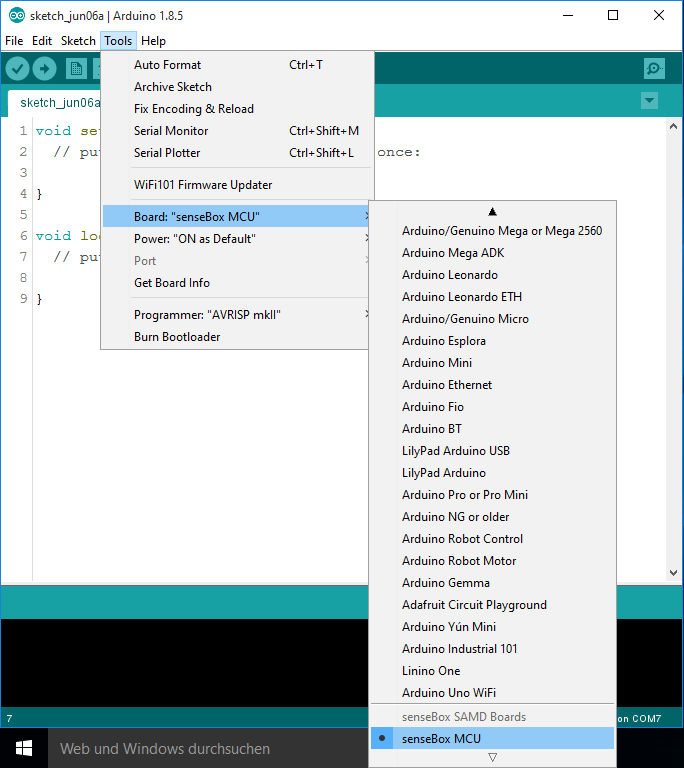
First, you choose Tools in the menu bar and search the senseBox MCU in the option Boards.
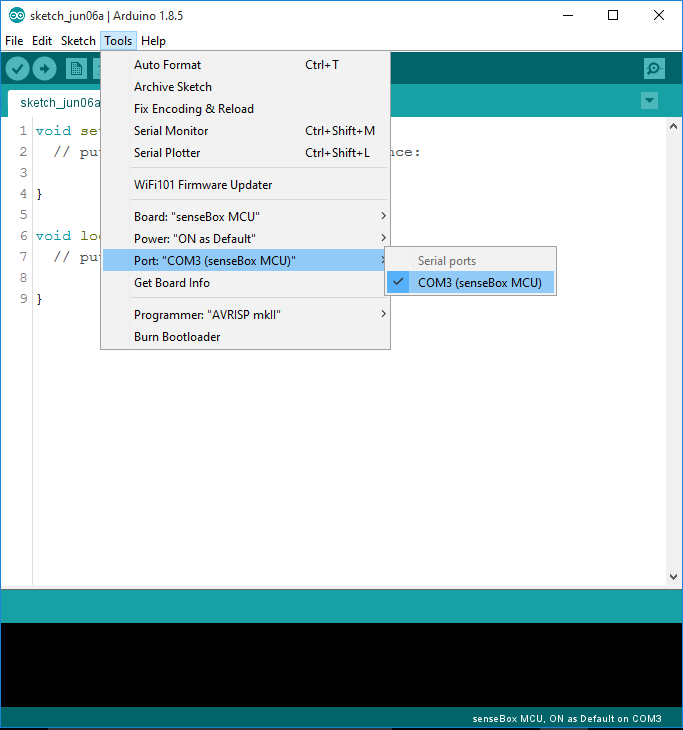
Second, you choose again Tools and Port and search for the USB Port of your computer which is aligned to the senseBox MCU. Usually the computer gives you only one option. Depending on your operation system you have to choose the port repeadetly when putting code on the board.
Hello World Example
Now you can start putting your first code on the senseBox. Therefore copy the following example into your Arduino IDE and click the arrow to upload the code on your senseBox.
In the down part of your Arduino interface you receive feedback about your uploading process (in the black colored box). If everything worked out sucessfully, you will receive the note Done upload.
int ledPin = LED_BUILTIN;

void setup()
{
  pinMode(ledPin, OUTPUT);
}

void loop()
{
  digitalWrite(ledPin, HIGH); // turn the LED on (HIGH is the voltage level)
  delay(1000);                // wait for a second
  digitalWrite(ledPin, LOW);  // turn the LED off by making the voltage LOW
  delay(1000);                // wait for a second
}
Now you have seen your first Arduino code. The text which you can see behind the // is not code, but a comment of the person who write the code. In programming this helps other persons to understand the code and also yourself to remember your ideas when building it. However, this comments will not be read by the compiler.
Test sensors and internet connection
Open the Test-Sketch
The Board-Support-Package comes wiht some test sketches for your senseBox. This file is named mcu_component_test and you can access it via File -> Examples -> senseBox-Tests). Now you can upload the code on your MCU by following the same instructions than you did for the Hello World Example.
After uploading the sketch on the MCU, you can start the Serial Monitor by clicking on the loupe icon on the right side. This should open a new window.
Option Menu in the Serial Monitor
After opening the Serial Monitor you find a menu with different functions which you can access using the search field:
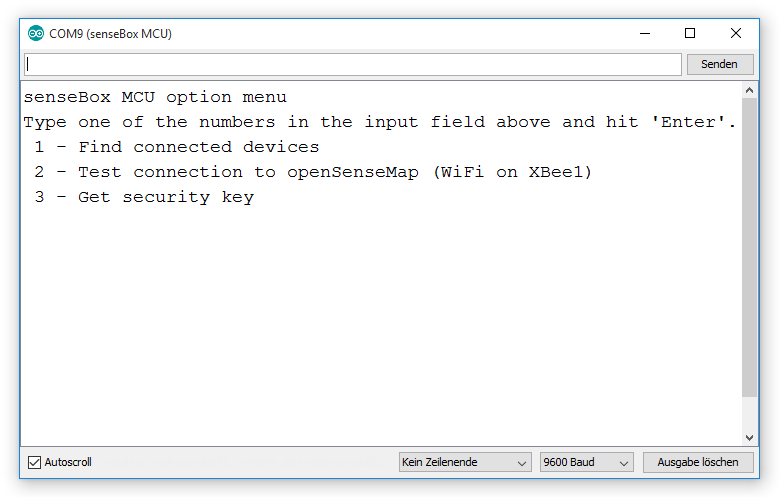
Just type the number of the option you want to test into the search field and click Send. Below you will find a list of options and a short description:
- Find connected sensors
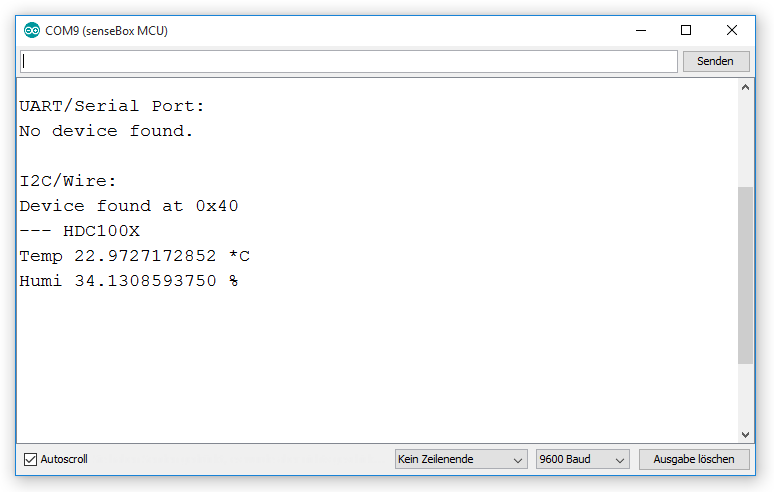
Here you can check if all sensors are installed in a correct way and if they are initialized and recognized by the senseBox. For each connected sensor you should receive a feedback and a test measurement. In the example below, a HDC1080 Temperature and Humidity sensor was connceted correctly to a I2C/Wire port.
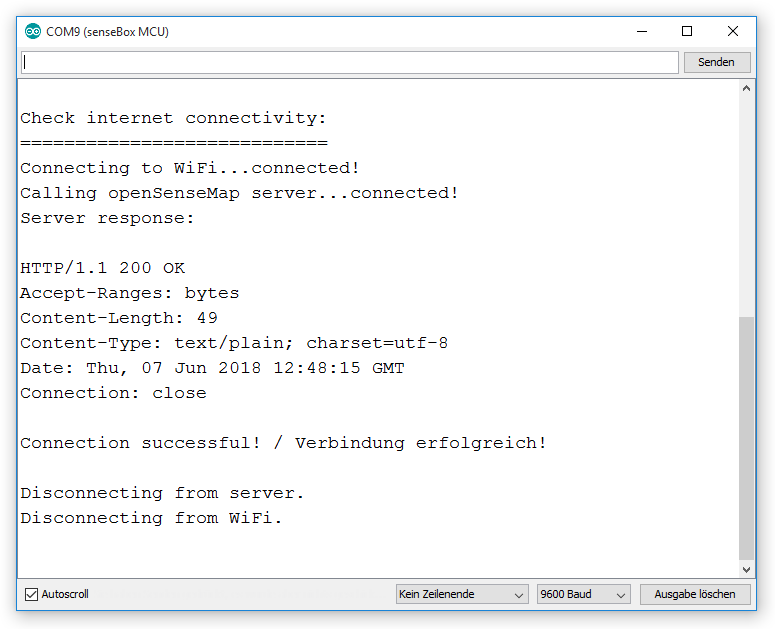
Test connection to openSenseMap
With this option you check your internet connectivity. If your senseBox successfully reaches the server you will get a response of the server in form of a HTTP-Status 200.
Test of sensors If you use a Wifi-Bee, the test also checks if your firmware is updated to the newest version. If the version of your Wifi-bee is not the newest, you should update the firmware as described in the FAQ of this book.Get security key
Each senseBox board has a own and unique security key which you can receive here. This key is used to encrypt the connection between the senseBox and the openSenseMap.
We are currently working on a system to register your senseBox on the openSenseMap by using this key. For the first you can proceed without remembering the key.